
By Bradley Smrstick, M.Ed., Professional Learning Consultant, Microsoft Innovative Educator Expert
Today’s modern classrooms often embrace student access to digital devices like computers, tablets, and even phones. In these hybrid classrooms, teachers often find it beneficial to include video content in their lessons. Digital Textbook companies provide a significant amount of video content for teacher & student use. However, finding suitable video content can be difficult when teaching a skill/concept/process that is unique to their school/district/content area/subject. In these cases, it’s up to the teacher to create their own video content. Let’s explore some of the tools in Microsoft 365 that allow teachers to create their own screencast video content and then share it with their students quickly and easily.
Windows Game Bar
If you’re working on Windows 10/11 device then you already have access to the Windows Game Bar, which includes a simple set of tools that allow you to configure your screen capture. Then it’s just a matter of staging the content on the screen and executing the screen capture.
To use Game Bar:
- Stage the content you wish to capture on the desired screen
- Click the desired screen to select it
- Press the Windows + G keys simultaneously
- Select the status of the microphone (on/off)
- For a Screen capture video click the Record button (a floating Status toolbar appears)
- Execute the process on your computer screen just as if you were teaching it in real time
- Click Stop when finished
- Click the “See my captures” link to review your work
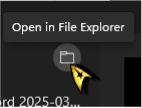
- Click open in File Explorer to export to other locations.

PowerPoint (desktop version)
PowerPoint can also be used to capture a screencast video. Just click the Record tab to explore the recording options and editing tools available. When screen recording in PowerPoint it’s important to stage the content on the desired screen so when the record button is clicked the desired content remains in view.
To record in PowerPoint:
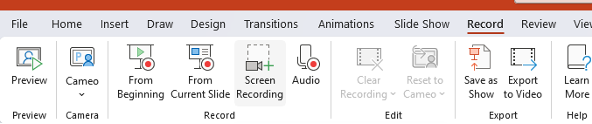
- Select the Record tab
- Click Screen Recording
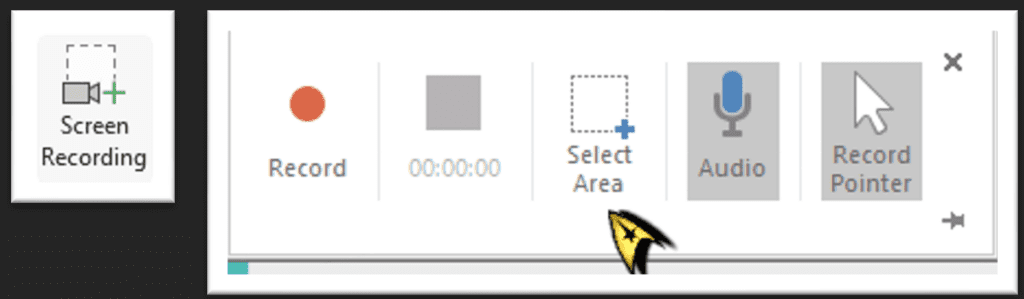
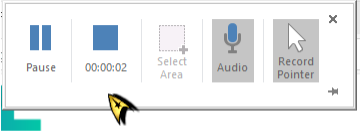
- In the floating toolbar select:
a. The Area you wish to record
b. Microphone (on/off)
c. Mouse/curser (on/off) - A 3 sec. countdown timer will appear
- At the end of 3 sec. the countdown timer disappears, and recording begins
- Execute the process on your computer screen just as if you were teaching it in real time
- Mouse up to the top center of the screen to bring the floating toolbar back
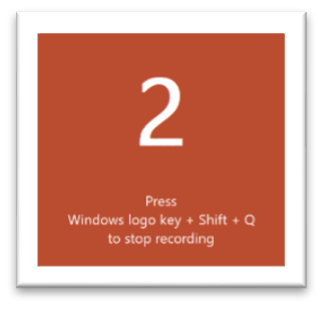
- Click Stop when finished
- The recording is inserted directly onto the slide of your PowerPoint.
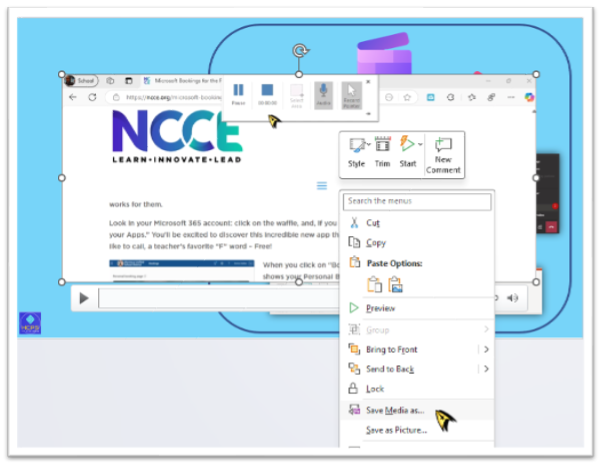
The video from that slide can also be used on that slide in a Slideshow OR it can be exported from PowerPoint. To export, right click on the video and select “Save Media as” and navigate to the desired location (OneDrive, Teams, SharePoint, Stream etc.) name the selected file, and then set the desired level of permissions for sharing.
Stream & Clipchamp (on the web)

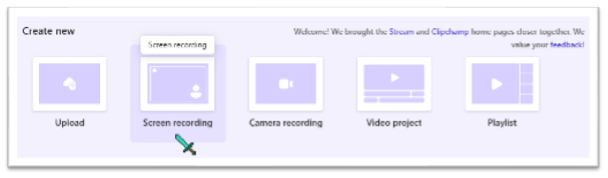
Another screencast recording option is using the screen capture tool inside of Microsoft Stream. Just click the app launcher tool from any Microsoft 365 screen and select Stream or Clipchamp. The Stream/ Clipchamp homepage offers a series of buttons across the top of the screen, including Screen recording. As you might suspect, screen recording is very similar to recording in PowerPoint.
To screen record in Stream/Clipchamp:
- Click the Screen Recording tile
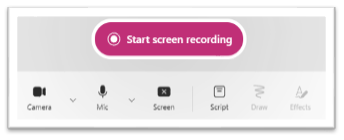
- In the Screen Recording window use the available tools and select:
a. Cameo (on/off)
b. Camera and microphone
c. Other effects (vertical toolbar) - Click Start screen recording
- Select the desired screen to record
- Execute the process on your computer screen just as if you were teaching it in real time
- Click Stop to end the recording
- Use the tools at the bottom of the Stream window to edit and modify the recording
- Click Finish and the finished video file is exported by default to Stream.
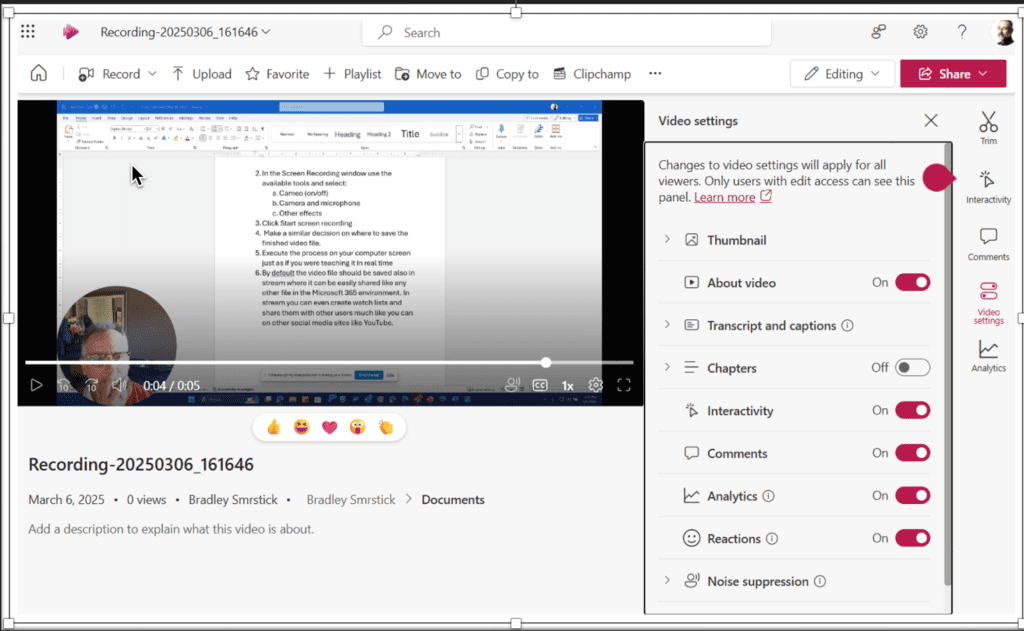
In stream you can even create watch lists and share them with other users much like you can on other social media sites like YouTube.
Teams Meeting (on an iPhone)
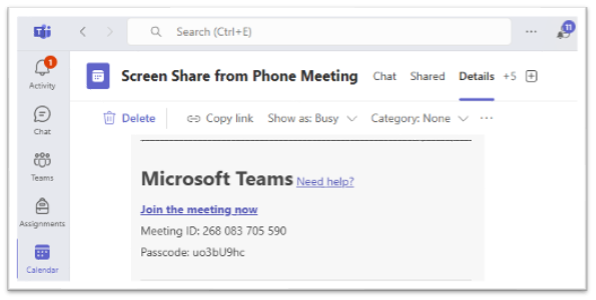
Everyone knows that Teems Meetings are a great way to bring people together virtually, but they are also a great way to record a Screencast video of your shared computer screen. What some people don’t consider is that a Teams Meeting is also a great way to record a Screencast video of your shared phone screen. This means that you can demonstrate (and record) the behavior of any online resource on your phone. This can be a game changer when the behavior of your online application is significantly different on your phone and there is no phone emulator for your application.
To get started, just schedule and start a Teams meeting on your computer, then:
- Start the Teams Meeting on your computer
- Use the link to the Teams Meeting to join the SAME MEETING from your iPhone. (No one else needs to be in or even aware of the meeting.)
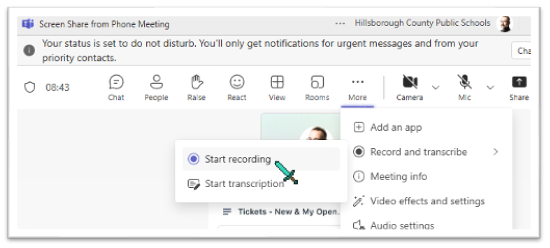
a. In the Teams toolbar at the bottom, click the three dots (more) icon
b. In the next menu screen, select Share
c. Select Share Screen (with Audio)
d. Click Start Broadcast - When you see the Stop Broadcast pop-up you are successfully sharing your screen into the Teams Meeting:
a. Swipe up from the bottom of your screen and select the desired application (app, website, document, etc.)
b. Swipe the Teams “thumbnail” off the screen to hide it - Return to your computer and Start Recording the meeting (see sample Screencast share below)
- Return to your iPhone and conduct your demonstration of the desired online content (with Audio as desired)
- Return to your computer and Stop Recording the meeting
- Return to your iPhone:
a. Click the arrow icon on the edge of your screen to bring the Teams Meeting “thumbnail” back into view
b. Click Stop Presenting
c. In the Screen Broadcasting pop-up click OK
d. Leave the Teams Meeting on your iPhone - Return to your computer and retrieve the recording in your OneDrive>Recordings folder

Benefits for Students
- Personalized Learning: Custom video content allows teachers to tailor lessons to the specific needs and interests of their students, making learning more relevant and engaging.
• A student struggling with math concepts can watch a teacher-created video that breaks down the steps in a way that matches their learning style. - Accessibility: Videos can be accessed anytime and anywhere, providing students with the flexibility to learn at their own pace and review material as needed.
• A student with a busy schedule due to extracurricular activities can catch up on lessons during their free time. - Enhanced Understanding: Visual and auditory elements in videos can help clarify complex concepts, making it easier for students to grasp and retain information.
• A student learning about the water cycle can benefit from a video that visually demonstrates each stage of the process. - Active Engagement: Interactive video content can stimulate student interest and participation, fostering a more dynamic and immersive learning experience.
• A student who finds traditional lectures boring might be more engaged with interactive videos that include quizzes and prompts. - Skill Development: Creating and using video content encourages students to develop digital literacy skills, which are essential in today’s technology-driven world.
• A student interested in media and communications can learn valuable skills by creating their own video projects.
As you can see, there are many similar ways to capture a Screencast video in M365. I hope you’ve seen something here that will inspire you to take a few moments and create your own screencast video content for use in your classroom with one of these (or any other) free tools.

By Bradley Smrstick, M.Ed.,
IT Senior Analyst, Customer Success
Professional Learning Specialist
Microsoft Innovative Educator Expert